Operating the P1S
The SOP for the lab's three Bambu Lab P1S printers — what you can print, sending a job from Bambu Studio, what to watch, and cleanup.
Left P1S
The left of the three Polymaker CoPE workhorses — follow this SOP for it.
Middle P1S
The middle unit — same machines, same workflow; this SOP covers settings and troubleshooting.
Right P1S
The right-hand unit — quick start, settings and common fixes are all in this SOP.
This is the SOP for the three P1S printers — Left, Middle and Right. Read it once before your first print: what you can print, how to send a job from Bambu Studio, what to watch for, and what to do when a print goes wrong.
What you can print
| Material | Who can use it |
|---|---|
| Polymaker CoPE | Anyone |
| Polymaker PETG | Anyone |
| Anything else | Ask an Exco or Helper first — a quick message is enough |
Staff handle the AMS
Don't load or unload filament yourself. Helpers, Lab Assistants and Exco are the only ones who touch the AMS.
Sending a print from Bambu Studio
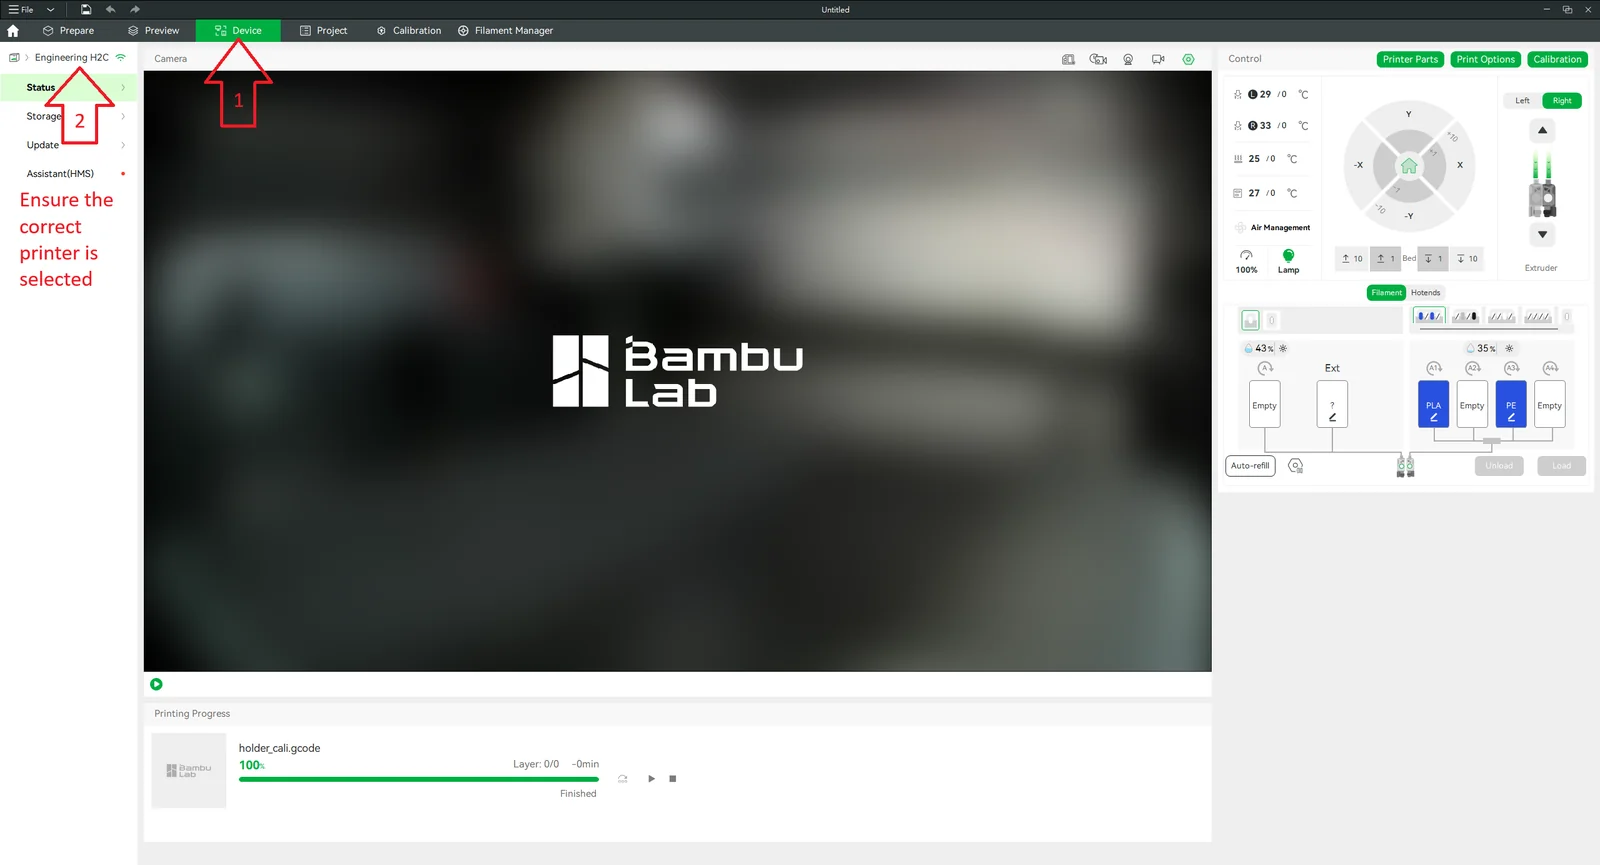
1. Pick the printer
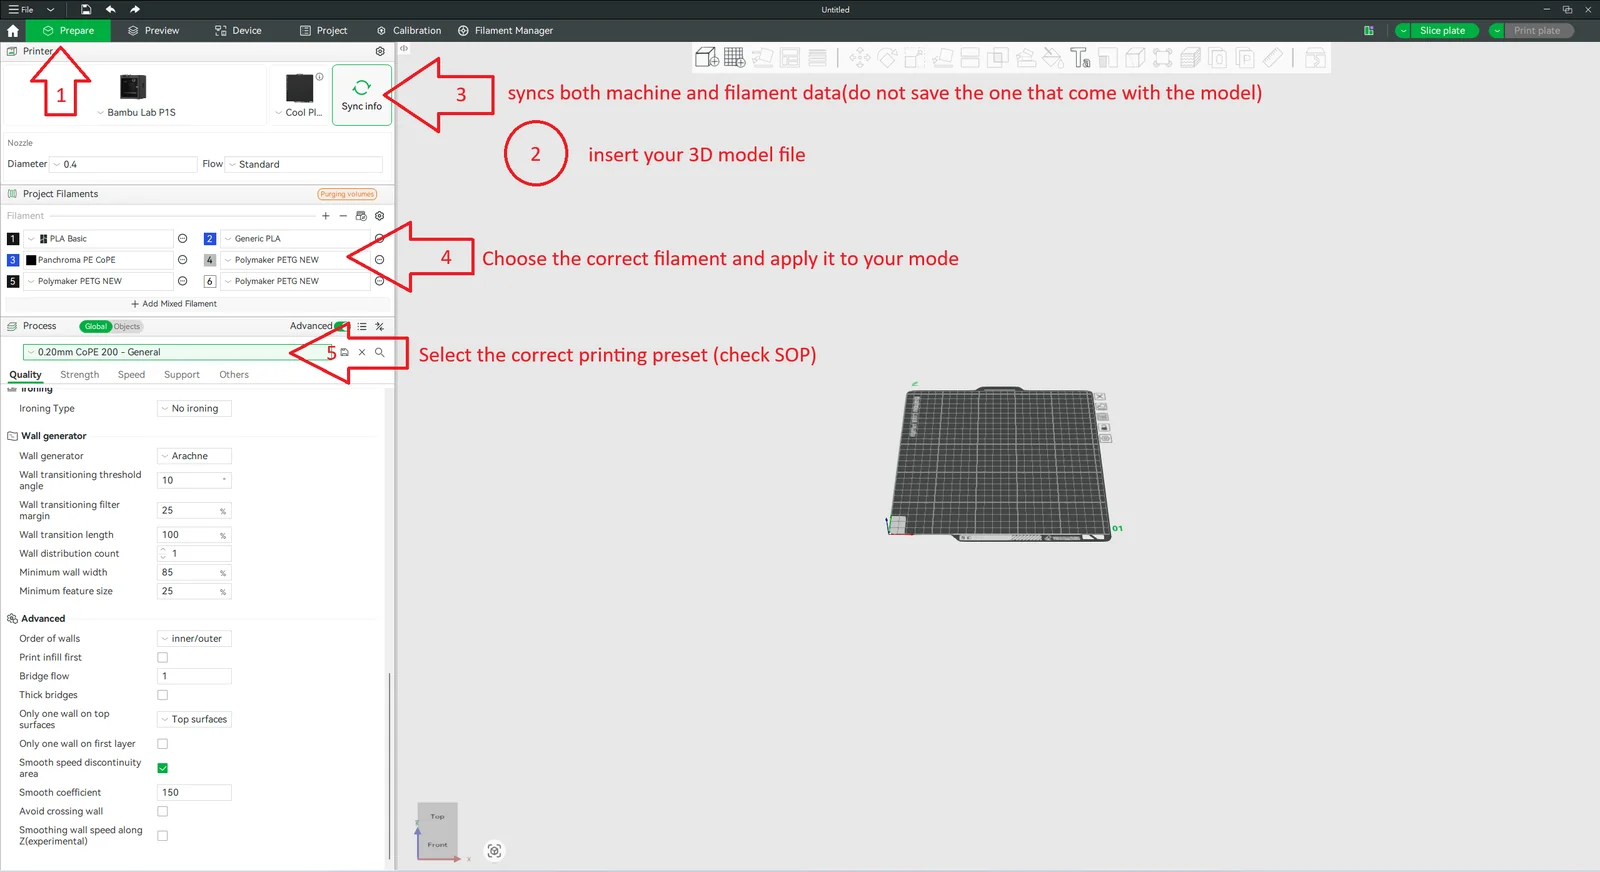
2. Set up the print
Choose the preset:
- CoPE: 0.2mm CoPE 200 - General
- PETG: no preset yet — ask a Helper or Exco what to use
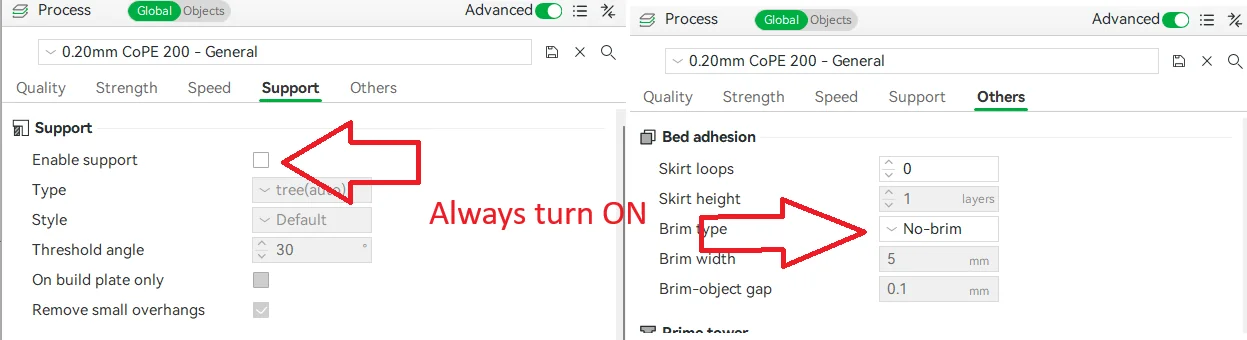
3. Supports and brim
Turn both of these on, basically always:
- Supports — for anything with overhangs
- Brim — keeps the print stuck to the bed
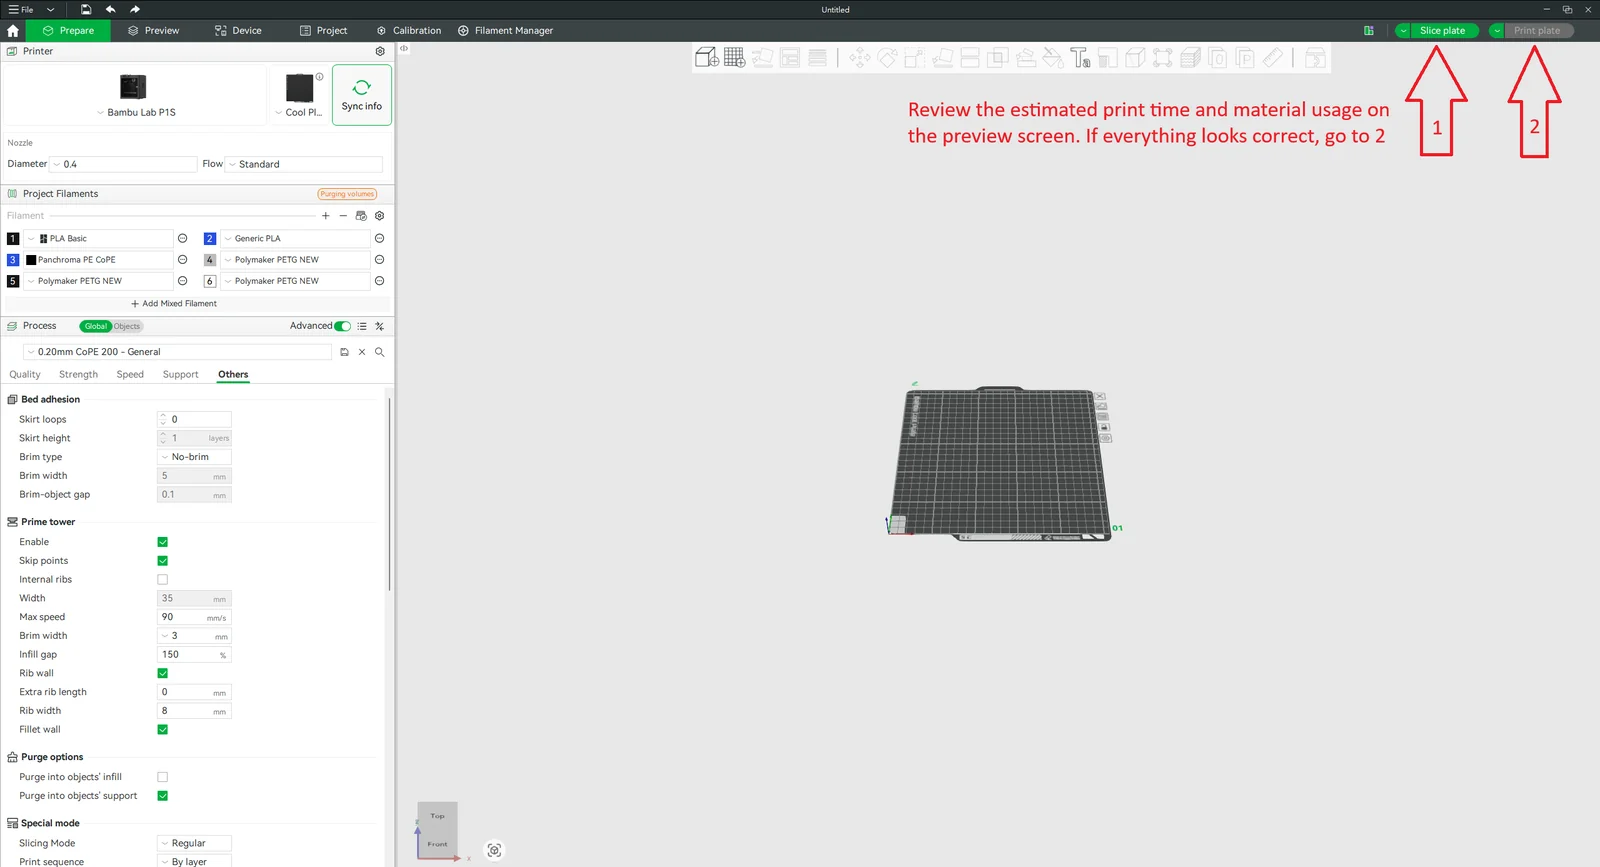
4. Before you slice
Thirty seconds of checking beats a failed four-hour print. Confirm the filament is right, the preset is applied, and supports and brim are on.
5. Slice and send
Watch the first layers
If the first layer goes down smooth and sticks, you're free to go. Spaghetti, lifting or shifting instead? Cancel it, work out what went wrong, then retry.
While it runs
You can leave the lab while your print runs — nobody expects you to watch the camera. Lab Assistants keep an eye on running prints and flag problems in the WhatsApp group.
Prints longer than 5 hours
Talk to a Helper or Exco first and they'll set you up with a nighttime slot.
When it's done
1. Pop it off
Two golden rules
Plastic scraper only — never metal tools — and go easy on the plate. A scratched build plate prints badly for everyone after you.
2. Put the plate back
Straight back onto the magnetic bed, not the bench. This is the single most forgotten step.
3. Clean it (optional, but worth it)
Dish soap and water, or diluted IPA.
When a print fails
- Report it — right away if you're standing there; if not, a Lab Assistant will report it for you.
- Printer seems fine otherwise? Just reprint.
- Real trouble — clog, mechanical weirdness: don't try to fix it yourself. Get a Technician or Exco.
Switching materials
No purging routine between CoPE and PETG. Just ask a Helper or Lab Assistant to swap the AMS filament.
Special materials
If you've got approval for something other than CoPE or PETG, know your temperatures and profile before you start. Unsure? Ask. Don't guess.
End of day
Nothing to shut down. The printers run 24/7, and quiet nights with an empty queue are when calibration gets done.
Quick do's and don'ts
| # | Do | Don't |
|---|---|---|
| 1 | Print CoPE or PETG freely (anything else: ask first) | Touch the AMS filament yourself |
| 2 | Watch the first 1–3 layers | Use metal tools on the plate |
| 3 | Put the build plate back right away | Scrape the plate hard |
| 4 | Arrange >5h prints with Exco/Helper in advance | Start long prints during the day |
| 5 | Ask when unsure | Guess settings for special materials |
Contacts
| Role | Who |
|---|---|
| Lab Assistants | [Names / Group] |
| Helpers | [Names / Group] |
| Exco / Head of Operations | [Name] |
| Technician | [Name / Contact] |
Placeholder rows from the original SOP — exco fills these in.